
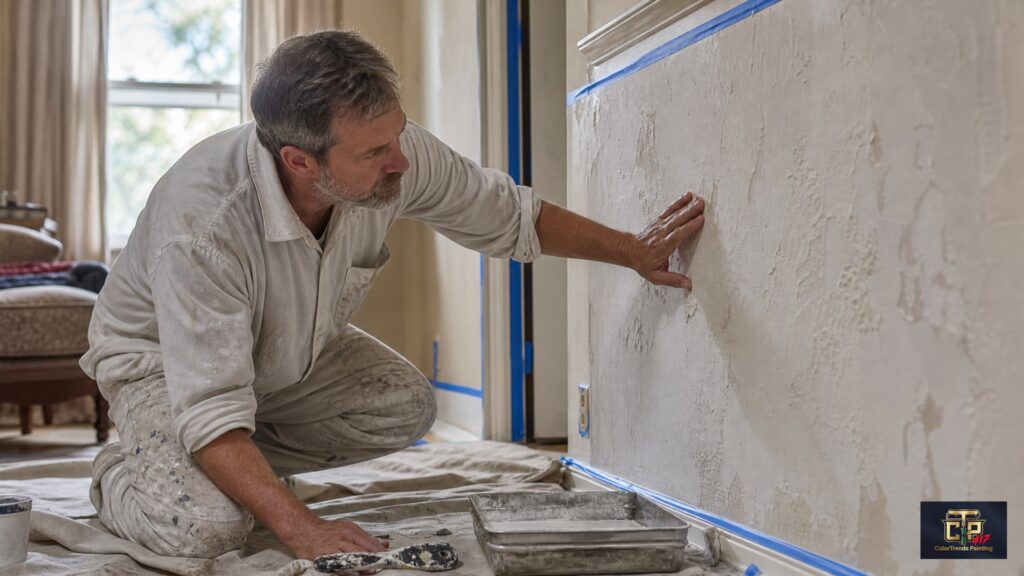
Steve Binger of ColorTrends Painting has seen enough Springfield interiors to know the truth: timelines come down to prep and wall condition, not square footage. Ask how long it takes to paint the inside of a house, and the honest answer depends on what’s under the current finish and how much detail work your space needs. A standard repaint in a well-maintained Springfield home might wrap up in three to five days. A full transformation with cabinet refinishing or heavy drywall repair can stretch past two weeks.
Steve personally handles estimates and jobsite work at ColorTrends, so the timeline he gives you reflects your actual walls, not a generic industry average. You deserve a schedule built on what he sees in your house, not a calculator output from a national franchise.
Realistic Interior Painting Timelines for Springfield Homes
Professional crews typically finish 400 to 600 square feet of wall space a day once prep is handled separately and conditions are good. That benchmark assumes standard ceiling heights and light repair needs, which rarely matches the reality of lived-in Ozarks homes where decades of wear sit behind the paint.
Average Duration by Home Size
Square footage is a starting point for estimating how long it takes to paint a house’s interior. Room count and layout complexity matter more than total area. A 1,500-square-foot ranch with open sightlines and sound walls often finishes faster than a 2,000-square-foot two-story with small bedrooms, intricate trim, and stairwells that need scaffolding.
Most average-sized Springfield homes fall into a four-to-seven-day range for a complete interior repaint, provided the walls are sound and colors stay similar. Larger properties, or ones needing real surface restoration, should expect seven to fourteen days of active work, depending on crew size and how much detail work the job involves.
Why Prep Work Dictates the Schedule
Rush the prep and you’ll see it once the lights come back on. No amount of premium paint hides a defect that started underneath. Cleaning, sanding, caulking, and priming eat roughly 40% of total project time, because that’s the foundation that lets the topcoat stick and last years instead of months.
Experienced painters put prep ahead of speed because cutting corners here just creates callbacks and unhappy customers down the road. Your timeline reflects that investment, even when the walls look fine at a glance.
Room-by-Room Painting Time Estimates
Different spaces need different levels of attention, and knowing the variations helps you plan your household routine around the work. Kitchens and bathrooms take longer than bedrooms because they have more fixtures, tighter clearances, and surfaces that need specialized treatment.
Kitchens and Cabinets
Cabinet refinishing transforms a kitchen, but it adds real time next to simple wall painting. The cleaning, degloss, and multiple thin coats needed for a factory-smooth finish take patience. Expect kitchen projects to run five to eight days when cabinets are included, since each coat needs proper curing time so it doesn’t stick or fail early.
Wall-only kitchen repaints move faster, but they still need careful cutting-in around backsplashes, outlets, and appliance gaps that slow production. You’ll notice painters spending real time masking and protecting countertops and floors before a brush ever touches the wall.
Bedrooms and Living Areas
Standard bedrooms are the most predictable part of any interior job, usually one to two days each when the walls are in good shape and the color change is moderate. Living areas with vaulted ceilings or large windows add setup time for ladders and scaffolding, though the actual rolling goes quickly once the equipment is in place.
These common spaces benefit most from a workflow that sequences cutting, rolling, and drying to keep daily output high without losing edge quality. Open floor plans can look simple but often need extra coordination to keep a wet edge across a big surface.
Trim, Doors, and Detail Work
Trim and detail work takes patience, and that patience extends the schedule beyond what wall square footage alone would suggest. Every door, window casing, and baseboard needs precise taping, careful brushing, and enough drying time between coats to avoid lap marks and keep the lines crisp.
Our trim and detail work guide gets into why millwork can’t be rushed without losing the clean look that defines a professional job. Budget an extra two to four days for a full trim package on a whole-home project. That labor-intensive phase is what separates real craftsmanship from a quick cover-up.
Factors That Extend Interior Painting Projects
Conditions change once work begins, especially in older Springfield neighborhoods where past renovations may have hidden problems underneath. Honest contractors build a buffer into the schedule, because finding a problem mid-project costs more in delays than admitting it’s possible upfront.
Wall Repairs and Texture Matching
In older Springfield neighborhoods, stripping decades-old wallpaper or repairing plaster cracks can add one to two days per room before painting even starts. Proper drywall repair and texture matching means compound application, sanding, and a primer seal that has to fully cure before the topcoat goes on. That’s a mandatory wait no matter how big your crew is.
Texture blending is its own challenge, because the new material has to disappear into a pattern that was applied by hand decades ago. This part resists any shortcut and takes hands that know the quirks of local housing stock.
Color Changes and Sheen Transitions
A dramatic shift from dark to light, or the reverse, needs extra coats and more drying time between applications to get even coverage without bleed-through. Moving between sheens, say from flat to satin, takes the same kind of care, since a glossier finish shows off every flaw that flat paint would hide.
Because of this, your painter may end up applying three or four coats where one would do for a simple refresh. Planning for that possibility now saves frustration later, when the calendar runs past what you first expected.
This approach won’t suit homeowners chasing the absolute lowest bid, regardless of prep standards or how the finish holds up over time.
Professional Crews vs. DIY Painting Timelines
A weekend-only DIY repaint typically stretches across six to eight weeks of stop-and-start progress. A professional crew compresses that same scope into consecutive working days. Owner-operated crews like ours bring the equipment, the workflow, and the trade knowledge that skip the learning curve and false starts that come with a first attempt.
Hiring experienced painters gets you more than speed. You get the consistent quality that comes from thousands of hours practicing techniques an amateur hasn’t had time to master, plus liability protection and warranty backing that a self-performed job can’t offer.
Our “We Help U PAINT” coaching service bridges the gap for committed DIYers who want expert guidance without full-service pricing. Steve gives you the strategic advice that helps you dodge costly mistakes, whether you end up hiring out or finishing the job yourself.
How Proper Preparation Accelerates the Painting Process
When you prep ahead of time, painters start productive work the moment they arrive instead of spending the morning moving furniture and clearing pathways. Every task you knock out beforehand either saves you money or buys extra refinement time within the same budget.
Homeowner Prep Checklist
Our homeowner prep checklist walks through specific steps built for Springfield-area homes and typical project scopes. Taking down wall hangings, moving small furniture, and pulling drapery hardware take no special skill, but they save real crew time.
Talk with your painter about who’s handling what before day one, so nothing gets duplicated and nothing falls through the cracks. Most homeowners knock out their share of the prep in one focused evening before the project starts.
What Professionals Handle Before Day One
Washing, sanding, patching, and priming stay firmly in the professional’s hands, because getting any of those wrong undermines everything that follows. Our wall preparation guide walks through the reasoning behind each step, so you understand why certain tasks shouldn’t be handed off.
Professionals also check moisture levels, flag lead paint risk in pre-1978 homes, and document existing damage before work starts, which sets a clear baseline. That documentation protects both sides by heading off disputes over what was already there versus what happened during the job.
Planning Your Interior Painting Schedule Around Daily Life
Coordinating painting phases with your family’s routine takes an honest conversation about ventilation, pet safety, and noise tolerance during Missouri’s humidity swings. Talking through room-by-room sequencing with your painter cuts down on disruption, since high-traffic areas get finished first and the rest of the house stays functional.
Talk through temporary relocation for anyone sensitive, human or animal, who can’t tolerate even low-VOC exposure during application and curing. Working around school calendars, work-from-home days, and the season keeps everyone comfortable while the transformation happens.
Ventilation needs shift a lot between summer and winter in the Ozarks, and that affects both drying time and indoor air quality. Your contractor should walk you through those seasonal adjustments during planning, so you can decide on timing and occupancy with real information.
Getting an Accurate Timeline Estimate for Your Project
An accurate estimate needs an in-person look, because photos and descriptions can’t show substrate condition, access limits, or hidden damage that only a physical inspection turns up. Tell your estimator your goals, your concerns, and any deadline you can’t move, so they can account for the variables a generic calculator misses.
Steve Binger’s hands-on estimating comes out of more than thirty years assessing exactly what Springfield-area homes need for a finish that lasts. Request professional interior painting services and you get a condition-based timeline built for your property, not an industry average pulled from a different market and newer construction.
Bring samples of the colors you want, note any known problem areas, and share your ideal completion window, so the estimate reflects what’s real rather than an optimistic guess.