
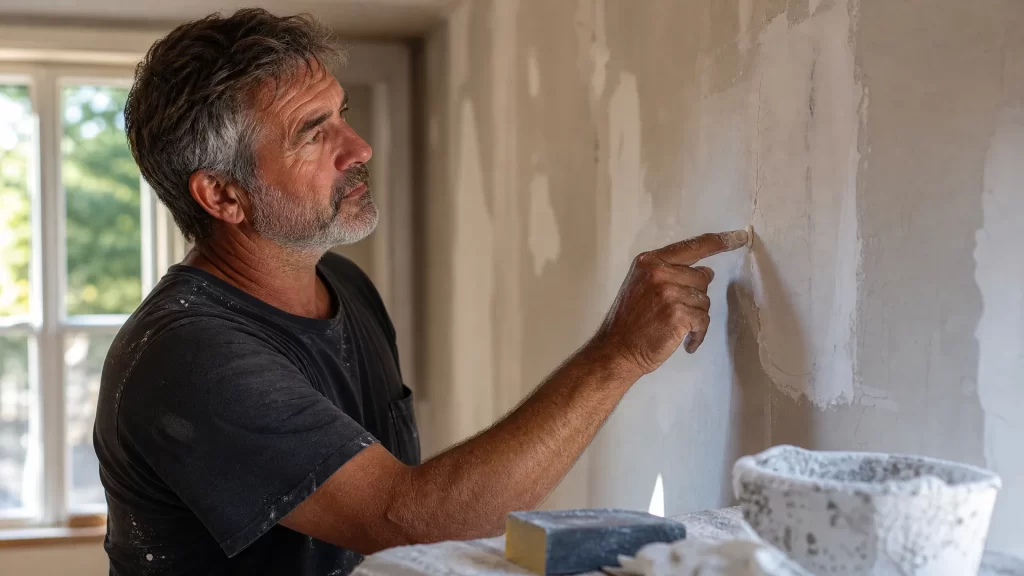
After 30 years of painting homes
including across Springfield, Nixa, and Ozark, I can tell you paint failure is almost never about the paint. It’s about what happened, or didn’t happen, to the wall before the roller ever touched it. Homeowners spend hours picking the perfect color and then rush the part nobody sees. That’s backward. If you want to know how to prep walls before painting the right way, the honest answer is: slower than you think, and in the right order.
Why Wall Prep Before Painting Determines Your Final Result
A fresh coat of paint is only as good as the surface underneath it. You can use the best paint on the shelf, and it will still crack, peel, or show every flaw if the wall wasn’t ready for it. That’s the whole idea behind proper wall prep before painting. It’s the difference between a finish lasting years, not months, and one that needs redoing by next winter.
Prep isn’t glamorous. It’s dust, patching compound, and a lot of sanding before anyone opens a paint can. But it’s also the one part of the job that a homeowner rushing to “just get it painted” tends to skip. And it always shows.
What Happens When You Skip Prep
On a recent interior repaint in Springfield, a homeowner had already bought premium paint but skipped patching a hairline drywall crack. Within two months, that crack telegraphed right back through the new coat. The paint wasn’t the problem. The prep was.
Skip cleaning, and paint won’t bond to grease or dust. It peels in sheets within a year. Skip sanding, and every patch and old roller mark shows through as a shadow under the new color, especially in raking light from a window. Skip primer where it’s needed, and stains bleed through, sheens go blotchy, and new drywall drinks paint unevenly. None of these failures are rare. They’re the most common calls we get for repaint jobs that shouldn’t have needed a repaint yet.
How to Prep Walls Before Painting, Step by Step
The order matters here almost as much as the steps themselves. Skipping ahead, say, patching before you’ve cleaned, or sanding before the mud has cured, just creates new problems layered on top of the old ones.
Cleaning and Clearing the Room
Start by clearing the room, or at least pulling furniture to the center and covering it. Take down outlet covers, switch plates, and anything hanging on the walls. You need full access to every inch of surface, including corners and behind where furniture usually sits.
Next, clean the walls. Dust alone will stop paint from bonding properly, so a dry microfiber wipe-down or a vacuum with a brush attachment handles most rooms. Kitchens and bathrooms usually need more work: grease near stoves, soap film near showers, and general grime near light switches where hands touch the wall constantly. A mild degreasing cleaner and a rinse works better than pushing harder with plain water, which just smears grease around.
Let walls dry fully before moving to patching. Trapped moisture under new compound is a problem you won’t see until the paint’s already on.
Fixing Holes, Cracks, and Texture Issues
This is where most DIY jobs go sideways, and it’s also where the final result is won or lost. Nail holes, screw holes, and small dings get lightweight spackle or drywall compound, applied slightly proud of the surface so it can be sanded flush once dry.
Cracks are trickier. Hairline cracks in drywall often come back if you just fill them flat. They need to be lightly widened, filled, and reinforced with mesh tape for anything longer than a few inches. Larger holes, from doorknobs punching through or old anchors ripping out, usually need a patch cut from a scrap of drywall, not just compound piled into the gap.
Texture matching is the step people forget entirely. If your wall has orange peel or knockdown texture, a smooth patch will stick out like a bald spot once painted, even if the color is identical. Feathering the texture out gradually, and matching it with a texture spray or brush technique, is what makes a repair disappear instead of announcing itself. For anything beyond small nail holes, it’s worth reading up on professional drywall repair before painting before you commit to a DIY patch, because a bad patch is harder to fix than a crack you leave alone.
Sanding Walls Before Painting: What Actually Matters
Sanding walls before painting isn’t optional busywork. It does two real jobs. First, it smooths every patch, ridge, and drip so the surface is flat under raking light. Second, it dulls the existing sheen on glossy or semi-gloss walls so new paint actually grips instead of sliding around and peeling later.
If you can still feel a repair with your fingertips after sanding, the paint will find it and show it to every guest who walks in. Run your hand across every patch before you call it done. Your fingers catch what your eyes miss, especially under indoor lighting.
You don’t need to sand walls that are already smooth and freshly painted in a flat or matte finish going to the same finish. But if you’re changing sheens, painting over gloss or semi-gloss, or covering any patched area, sanding isn’t skippable.
Tools and Grit Choices for DIYers
For drywall patches, start with 120-grit sandpaper to knock down high spots, then finish with 150- to 220-grit for a smooth, paint-ready surface. Going coarser than that on drywall mud risks gouging it and creating new low spots to fill again.
For dulling glossy trim or walls before repainting, a fine-grit sanding sponge, in the 180- to 220-grit range, is usually enough to scuff the sheen without stripping the surface down to bare material.
Dust control matters more than most DIYers expect. A pole sander with a vacuum attachment keeps drywall dust from settling into every vent and surface in the house. At minimum, tape plastic sheeting over doorways and run a fan venting outside if you’re sanding a full room. Wear a dust mask rated for fine particulates. Drywall dust is fine enough to irritate lungs over a full afternoon of sanding.
Primer Before Painting Walls: When You Actually Need It
Primer before painting walls isn’t always necessary, but skipping it in the wrong situation is one of the most common, and most expensive, DIY mistakes.
You need primer when you’re covering a stain: water marks, smoke damage, marker, or crayon will bleed straight through most topcoats without a stain-blocking primer underneath. You need it over any patched drywall or bare mud, because unprimed patches absorb paint differently than the surrounding wall, leaving flat or shiny spots. Painters call this “flashing,” and it’s visible from across the room once the light hits it. You need it on new, unpainted drywall, full stop. And you generally need it when jumping from a dark color to a light one, or vice versa, to avoid multiple topcoats just to get even coverage.
Where primer is optional: repainting an already-primed wall in a similar color, with no patches, stains, or sheen changes involved. Paint-and-primer-in-one products can work fine here, but they’re not a substitute for real primer over repairs or stains. That’s a shortcut that backfires more often than it saves time.
One detail DIYers in our region miss: Missouri’s humidity swings mean drywall mud and caulk need real cure time before priming. In a humid stretch of summer, compound that looks dry on the surface can still be curing underneath. Rushing primer onto mud that hasn’t fully cured traps moisture and can cause cracking or bubbling later. As a rule, give patches and caulk at least 24 hours to cure in normal conditions, and longer, sometimes two to three days, during humid stretches or in rooms without good airflow. If you’re not sure it’s ready, press a knuckle against it; any give or cool dampness means it needs more time.
Wall Prep Before Painting: DIY Tips vs. When to Call a Pro
Most everyday wall prep is genuinely DIY-friendly. Cleaning walls, filling nail holes, sanding smooth patches, and priming a single wall for a color change are all reasonable weekend projects if you take the time and don’t rush the drying steps.
We treat every prep job, patch, sand, prime, clean, the same way whether it’s a rental in Branson or a family’s forever home, because the wall doesn’t know the difference. The same logic applies to your own house: a small patch deserves the same care as a big one, because the paint will show either way.
Warning Signs You’re Over Your Head
Some problems aren’t cosmetic. They’re structural or health-related, and that’s where DIY prep stops making sense.
Water stains are a warning sign, not just a cosmetic flaw. They almost always mean there’s an active or past leak somewhere, and painting over a stain without finding the source just hides a bigger problem. Large cracks, anything wider than a hairline, or cracks that run diagonally from a corner, can signal foundation movement, not just old drywall settling. Popcorn ceiling texture, especially in homes built before the 1980s, sometimes contains asbestos, and sanding it yourself is not worth the risk without testing first. Mold or a musty smell behind peeling paint means there’s moisture intrusion that needs addressing before any patch or primer goes on, or the mold just comes back under the new coat.
If you’re seeing any of these, it’s worth getting a second opinion before you pick up sandpaper. A full interior painting service in Springfield includes diagnosing these issues upfront, rather than discovering them mid-project. And once the walls are actually ready, a color consultation before you commit to paint helps make sure the finish and sheen match how the room’s actually used.
If you’d rather handle the labor yourself but want a professional eye on your plan first, you can get expert coaching through your DIY paint project before you buy a single tool or gallon of primer. It’s a middle ground between hiring it all out and guessing your way through it.
The same logic extends beyond walls, too. Prep matters for cabinets just as much as it does for drywall, since a rushed sanding or cleaning step shows up just as fast on cabinet doors as it does on a living room wall.
Interior Painting Prep Guide: A Quick Pro Checklist
Here’s the full sequence, in order, worth screenshotting before your next project:
- Clear the room and remove outlet covers, switch plates, and wall décor.
- Clean walls to remove dust, grease, and grime, then let them dry fully.
- Patch nail holes, dents, and small dings with lightweight spackle.
- Repair cracks with mesh tape reinforcement, not just filler alone.
- Cut and set drywall patches for larger holes, then feather-match texture.
- Let all patches and caulk cure fully. 24 hours minimum, longer in humid weather.
- Sand patches smooth with 120-grit, then finish with 150–220 grit.
- Dull glossy or semi-gloss surfaces with fine-grit sanding before repainting.
- Wipe down sanding dust with a damp cloth or tack cloth before priming.
- Prime any patches, stains, new drywall, or major color changes.
- Inspect for warning signs, like water stains, big cracks, mold, or popcorn texture, before proceeding.
- Paint.
Every one of these steps takes time you don’t get back once the paint’s on. Whether you’re doing this yourself or handing it off, the wall doesn’t care how confident you feel about the paint. It only cares about what happened before you opened the can.
Written by Steve Binger owner of ColorTrends Painting, with 30+ years of experience and over 400 homes painted.