
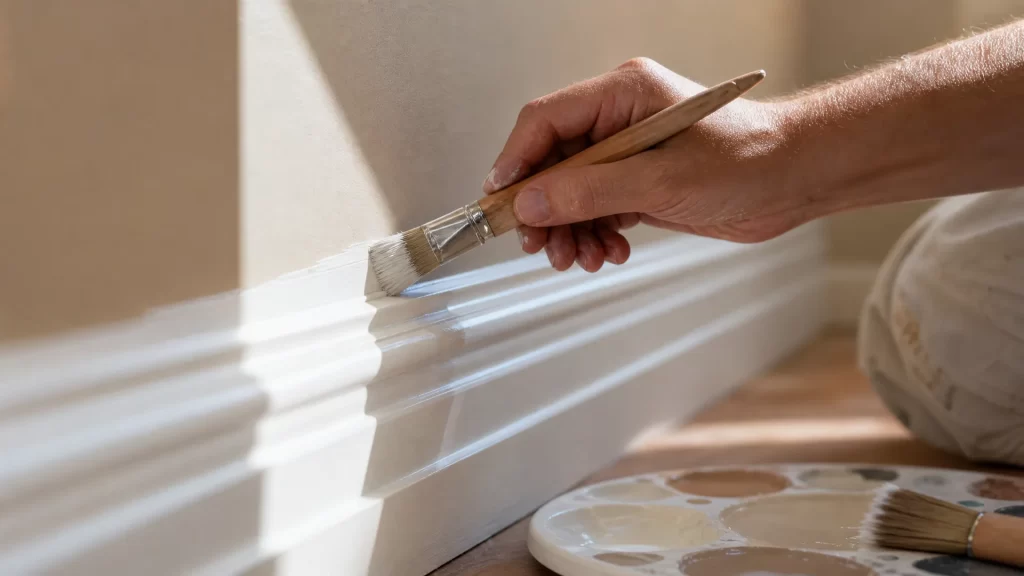
Most trim painting tips out there start the same way: buy good tape, press it down hard, and pray it doesn’t bleed. Steve Binger of ColorTrends Painting, Springfield, MO’s most trusted local painting contractor with 30+ years of experience, does it differently. He’s spent decades cutting clean trim lines by hand, rarely reaching for a roll of tape. That’s not a gimmick. It’s faster, and it produces a sharper edge once you’ve built the skill.
This guide walks through how a professional actually paints baseboards, door casings, and trim: the brush technique, the finish choice, and the small habits that separate a crisp line from a smudged one.
Why Most Trim Painting Tips Get It Backwards
Tape feels safe. You press it along the edge, paint inside the lines, and peel it away expecting perfection. In practice, paint bleeds under the edge anyway. This happens most on textured walls or older trim that isn’t perfectly flat. Then you’re left touching up the exact spot tape was supposed to protect.
Steve’s approach relies on brush control and a steady hand, not shortcuts. Experience is his best tool. After decades of cutting trim freehand, his hand knows the line before the brush even touches the wall.
The Problem With Relying on Tape
Tape takes time to apply correctly, and it takes time to remove. On a full room, that adds up to hours. It also creates a false sense of security. Paint can seep under the edge, dry there, and pull away chunks of finish when you peel the tape too early or too late.
Freehand cutting skips both problems. There’s no waiting for tape to set. There’s no risk of bleed-through, and no ridge where the tape edge sat. It just takes practice to get there.
How to Paint Baseboards and Trim Without Tape
Freehand cutting isn’t about being fearless. It’s about controlling your brush, your paint load, and your pace all at once.
Mastering the Cutting-In Technique
Start with a dry run. Trace the line with an empty brush so your hand learns the path before paint gets involved. Once you’re loading the brush, keep your wrist loose but steady. Let your pinky or the side of your hand rest lightly against the wall or trim as a guide.
Move slowly and deliberately, not in short jerky strokes. A long, even pull gives you a straighter line than several short dabs. If your hand starts to shake or rush, stop, reload, and start the stroke again rather than pushing through a bad line.
On a recent Springfield living room repaint, freehand cutting on baseboards and door casings saved hours compared to taping every edge, with a sharper result. That’s the payoff once the technique clicks.
Tools That Make Freehand Cutting Possible
Good lighting matters more than most people expect. A raking light across the trim shows every ridge and gap. That makes it much easier to spot where your line is drifting before it dries.
A steady, well-loaded brush matters too. Dip about a third of the bristle length into the paint, tap off the excess, and avoid overloading. A brush dripping with paint is nearly impossible to control near an edge.
Confidence here builds with repetition. Nobody cuts a perfect line their first afternoon. Practice on a closet or a low-visibility wall before tackling the living room trim.
Brush Selection: The Real Secret to Clean Lines
Tape gets all the attention, but the brush does the real work. A quality angled sash brush is the single biggest factor in a clean trim line, more than any painter’s tape ever will be.
Choosing the Right Brush Size and Bristle Type
A 2- to 2.5-inch angled sash brush handles most baseboard and casing work. The angle lets you follow a straight edge naturally, using the tip of the bristles rather than the flat face of the brush.
Bristle type depends on your paint. Natural bristles work well with oil-based paints because they hold and release the paint smoothly. Synthetic bristles, usually nylon or a nylon-polyester blend, are built for latex and acrylic paints. They stay firmer in water-based paint and hold a sharper point at the tip. That’s exactly what you need for cutting lines by hand.
Cheap brushes shed bristles and lose their shape after a wash or two. Clean a quality brush properly, store it flat, and it will hold its edge for years. That’s a better investment than a bulk box of tape rolls.
Best Paint for Interior Trim: Semi-Gloss vs Satin
The finish you choose affects both how the trim looks and how well it holds up over time.
Semi-gloss remains the traditional go-to for high-traffic trim because it wipes clean easily, resists scuffs, and holds up to the bumps of daily life near doors, baseboards, and hallways. It’s been the standard in trim painting for decades for good reason.
Satin has been gaining ground with homeowners who want a softer, more modern look. It has less shine than semi-gloss, so it reads more like a subtle highlight against the wall color rather than a bright accent. It’s still washable and durable, just with less reflective glare.
Neither finish is wrong. Semi-gloss makes sense if the trim sees heavy wear or you want that crisp, classic contrast. Satin suits a quieter, more contemporary interior where you don’t want the trim to compete with the wall color. If you’re weighing sheen against your overall color scheme, a professional color consultation can help you land on the right combination before you buy a gallon.
Painting Door Trim: Common Trouble Spots
Door casings give beginners more trouble than straight baseboard runs. The corners are tighter, the hardware gets in the way, and the vertical surfaces show every drip.
Handling Corners, Hinges, and Hardware
Inside corners are where most brush marks pile up. Cut into the corner from both directions rather than trying to force one long stroke through the joint. Let the two strokes meet, then smooth the overlap with a light, dry pass of the brush tip.
Hinges and hardware should come off if you can manage it. If removing hardware isn’t practical, hold a small piece of cardboard or a putty knife against the hinge instead of tape. You can reposition it instantly without leaving adhesive residue.
For vertical casings, paint in the direction of the wood grain and finish each section with a single upward stroke to smooth out brush marks before the paint starts to set. Work in shorter sections rather than trying to coat the whole casing in one pass. That keeps the paint wet enough to blend cleanly.
Building DIY Confidence for a Trim Transformation
Every skill on this page comes down to repetition. Pick one small section, like a single door casing or a few feet of baseboard, and practice the cutting-in motion until it feels natural. Most homeowners notice a real jump in control after just a few sections.
If you’re prepping a full room, trim usually comes after the walls are done. Getting that sequence right, along with proper surface prep, makes the whole job go smoother. The details on prepping walls before you paint are worth a look before you start.
If you’d rather build these skills with someone watching over your shoulder, ColorTrends Painting’s one-on-one DIY painting coaching is built exactly for that. Steve works directly with Springfield-area homeowners who want to learn proper technique instead of guessing their way through a project.
And if the trim work, or the whole interior, is more than you want to take on yourself, ColorTrends Painting backs its interior trim work with a 5-year warranty. That’s confidence built on prep and application quality. Family-owned and serving Springfield, Nixa, Ozark, and nearby communities since 1998, the team offers professional interior painting services in Springfield for anyone who’d rather hand the brushes to someone with 30-plus years of practice.
Whether you’re picking up a brush for the first time or planning a full repaint, Springfield homeowners can reach out to Steve Binger and ColorTrends Painting for a consultation, or explore the We Help U PAINT coaching program if you want expert guidance while you do the work yourself.
Written by Steve Binger
Owner of ColorTrends Painting – Springfield, Missouri
With over 30 years of professional painting experience, Steve and his team deliver flawless interior trim work and high-quality finishes homeowners trust.
Ready for pro results on your next project? Contact ColorTrends Painting today for a free estimate!